I’ve heard from many pro painters that painting without tape is faster. They claim that once you get good with a brush, cutting-in (a technique for painting around edging without tape) will save you time and simplify your painting project.
When the first person told me this, I immediately thought there must be a trick to it.
So, like any weirdo who overthinks this type of thing, I did some research. I watched every youtube video I could find about painting trim without tape. Most of these videos were from pro painters who convincingly said it was faster.
Since then, I’ve gone back and forth several times. I’ll use tape on some projects, and then on others, I’ll practice painting around trim without tape.
And every time I painted without tape, I questioned if it was actually faster. I knew it was more effort and required more focus. But was it faster?
Finally, I designed a simple test to figure it out and was surprised by the results.
Check out this video and see for yourself:
The Problems With Painting Without Tape
Besides being slower, there are several other reasons that painting without tape is a poor choice for most people.
Problem #1 – It requires more effort and focus
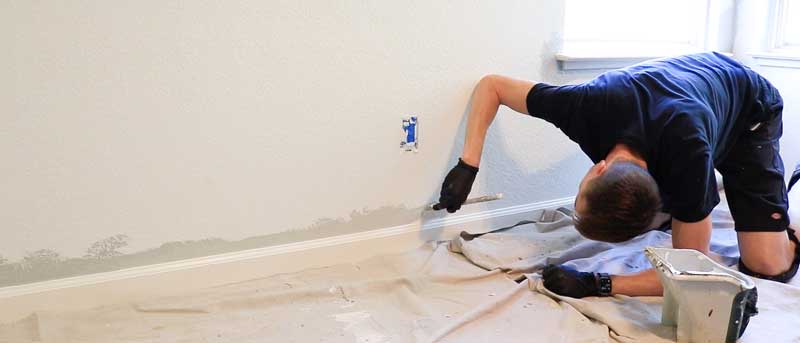
Cutting-in edges without masking tape requires a lot of focus and attention, even if you are good with a brush. When painting around baseboards, this extra effort is amplified by having to sit on your knees in an awkward position for a long time. When you use painter’s tape, however, you can slap the paint on without paying much attention at all as you sit in a more comfortable position. Yes, you must pay attention while applying the tape, but this process is surprisingly fast.
Problem #2 – Paint Splatter
If you fail to put masking tape on your baseboards, you will get a few drips of paint or splatter on your baseboards while rolling or painting somewhere else. If you fail to catch this immediately, cleaning up can be challenging. Even if you catch it immediately, it requires more time to clean up.
Problem #3 – Worse Edges
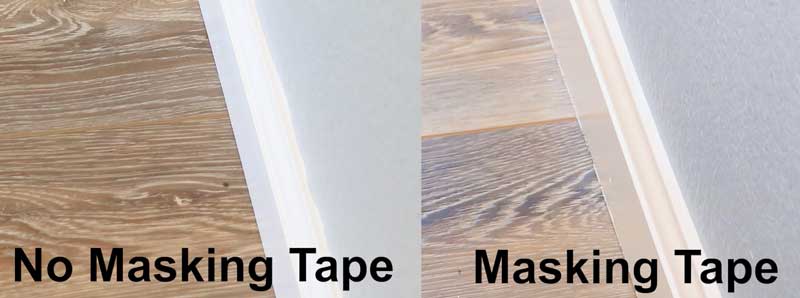
I don’t care how good of a painter you are; I’m 100% certain you can get straighter edges using masking tape. Trying to out-quality a perfectly straight edge is like trying to out-compute a computer. You gonna lose.
Why do pros think painting without tape is faster?
So why do painters insist on cutting in by hand, despite masking tape being faster, easier, and creating a higher quality result?
I think there are multiple reasons.
First, it’s a pride thing. It seems that being able to cut edges without tape is a sign of skill that gives you status within the painting community. Any pro who dares admit that they use tape has to use disclaimers for fear of being called an amateur.
Secondly, it’s an illusion. Since you get to skip a step (applying the tape), it seems like it would be faster. But in reality, all you’re getting is the instant gratification of skipping some prep and getting straight to applying the paint. It’s like starting a business without taking the time to create a strategy or implement systems to support your while in the business. You start making money faster but quickly pay for the skipped steps down the road in lost profits and inefficiency.
Third, pro painters can cut in faster. I’ve heard of painters who can paint pin-striping by hand, which is incredible. And I don’t doubt it because people can do some amazing things with enough time and practice.
I don’t doubt that for some pro painters out there, skipping the tape is faster. However, I doubt they are getting as good of paint lines as I am when using tape. And even if they are faster without tape, it’s likely not by much, and it’s still requiring a ton of effort and focus.
So for some pros? Painting without tape makes sense in certain situations. But for a handyperson who paints a few times per month? Stick with the tape. It’s faster, better, and easier.
How to get perfect paint edges around trim
Now that I hopefully have you at least open to the idea that painting with tape is faster, let’s talk about some tips for doing that well.
Tip #1 – Use Frog Tape
Most masking tape will allow the paint to bleed through the edges. But, if you use Frog tape or a similar tape from another manufacturer, this will mostly be eliminated.
Tip #2 – Push the edges of the tape down firmly
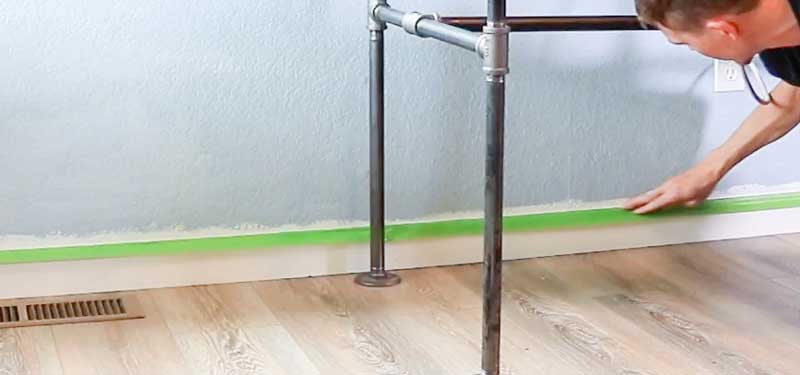
After applying the tape, go back and rub your finger along the edge to make sure it is securely attached and conforms to any abnormalities of the surface. Even if you use Frog Tape, if you skip this step, you’ll still get a lot of bleeding on the edges.
Tip #3 – Wipe off your trim before applying the tape
This only takes a second. Grab a damp rag and wipe off any dust or dirt, so the tape has a clean surface to stick to.
Tip #4 – Don’t allow the paint to pool on the tape
Even though you have applied tape, try to minimize the amount of paint you get on the tape. Do this by holding your brush perpendicular to the wall and only allowing the sides of the bristles to graze the trim. This is another tactic to prevent paint from bleeding through.
Tip #5 – Remove the tape at a sharp angle
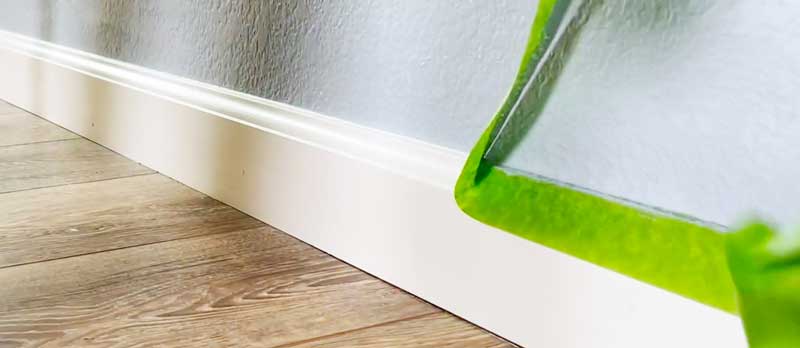
You don’t need to wait for the paint to dry before removing the tape. After you’ve applied two coats, remove the tape by pulling away at a sharp angle, as you can see in the image above. Pulling the tape straight up may peel some of the paint off the walls, especially if the paint has had a chance to dry before you remove the tape.
If you follow those five tips, you’ll find yourself painting perfectly straight and crips lines in about half the time it would take to cut in by hand. Your knees and your back will thank you.
Then, spend the time you saved hanging out with your kids.
How To Paint Without Tape – Tips for Cutting-In
Painting edges and trim without tape has its place. I still cut in the edges around the ceiling because it’s the only way I’ve found to get a clean edge. Since ceilings are textured, taping them rarely works out well.
So, here are some quick tips to help you get cleaner edges without masking tape. I got most of these tips from the pros, so I want to give credit where it’s due.
#1 – Get a stiff, high-quality paintbrush
I’ve used the same purdy paintbrushes for the last ten years. So, invest in a good brush, take care of it, and it will last a lifetime. Flimsy bristles make it hard to cut in, especially when there is texture on your walls.
#2 – Hold your brush like a pencil with a loose hand (close to the bristles)
Rest the paintbrush handle between your thumb and index finger and hold onto the base of the bristles. This gives you far more control of the brush.
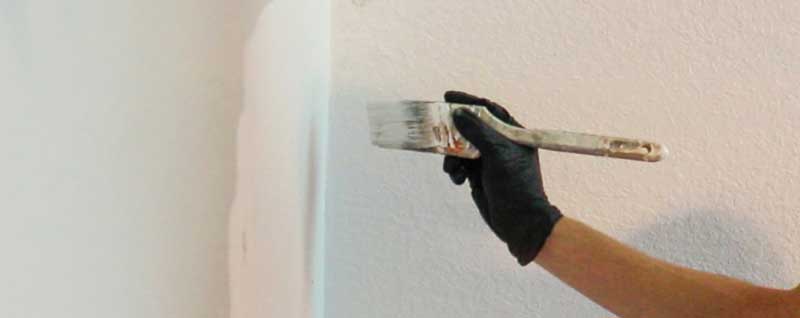
#3 – Have the right amount of paint on your brush
Dip the paintbrush in about 1″, then tap each side on your paint bucket once. This keeps the paint from dripping off your brush and gives you the right amount to apply.
#4 – Apply paint 1/4″ away from trim, then work your way closer to the edge
For the first pass, cut your line away from the trim to get some paint on the wall. Then, on the second pass, cut your line against the trim. The first pass will lay down some paint, making it easier to glide the brush and for the paint to flow off of the brush. It also helps you avoid getting too much paint on the leading edge of the brush, which can end up dripping or pooling next to the trim.
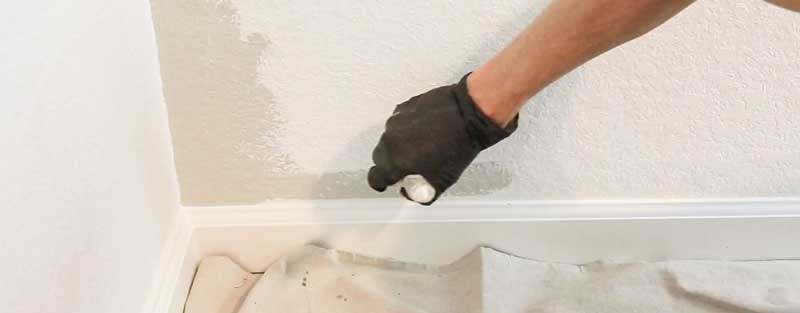
#5 – Go in both directions to accommodate for textured walls
Once you’ve cut a line in one direction, you’ll need to go back over the same line again in the opposite direction to get paint in the little crevices of a textured wall.
#6 – Paint 6-12″ at a time
You always want to have a good amount of paint on your brush. Otherwise, the paint won’t flow off very well. So only paint as far as you can without having to brush back and forth a bunch of times.
#7 – Use the last few bristles to cut in your edge
It’s much easier to control a few bristles than an entire edge of a paintbrush. So, focus on the last few bristles while cutting your edge.
#8 – Twist your brush slightly as you paint
This helps with tip #7. If you twist your brush toward your elbow as you paint, you’ll find it’s easier to have fewer bristles toward the trim, which gives you slightly better control. It also helps pull the bead of paint away from the trim so it doesn’t pool up.

Conclusion
For most people, painting without tape will take longer, require more energy, and lead to a lower-quality paint job. In fact, it will be twice as fast to use masking tape.
However, there are certain situations where cutting-in edges around trim by hand is the way to go, such as where a wall meets the ceiling.
Additionally, using high-quality painter’s tape, you can get perfectly straight lines and a paint job that rivals most professionals at a fraction of the cost.
Turn your DIY skills into a profitable side business and make over $100 per hour.

Home repairs and improvements are in high demand, and there aren’t enough service pros to fill that demand.
This is a massive opportunity for any handy person who enjoys helping people.
If this sounds interesting to you, I recommend reading this free report.
You’ll learn ten profitable services you can offer TODAY without a contractor’s license.
Then, I’ll send you more information about what it takes to build a profitable and enjoyable handyman business.
FREE REPORT: 10 Profitable Handyman Services You Can Offer WITHOUT a Contractor License


Superb article on this topic. This is actually not my forte, but my wife has become quite quick and efficient at this, and I have no doubt painting with tape is faster and creates a cleaner finish on any painting project. The paint splatters and the near impossibility of being completely steady on the edges proves that for anyone. With that said, you provide great “pro” tips for how to save time and paint without the tape. It will obviously always be the edges that cause the most re-doing and overly slow and steady painting, and that is why painting with tape is clearly the better option even with the increased setup time.