Tiling a shower is an advanced project, but with the right approach and information, an experienced DIYer can do it.
In this article and the video above, you’ll learn how to install tile in a shower, around a tub, or around a shower pan and do it like a pro.
Here’s What I Cover…
First, I provide a quick overview of what essential components must be included in a quality tile shower install.
Then, I’ll talk about different methods for waterproofing a shower and which one I recommend using.
Finally, I’ll walk you step by step through installing tile in this shower so you can see exactly how it’s done from start to finish – with plenty of practical and useful tips that will save you time and money.
Tile Shower Basic Construction and Essential Components
Let’s talk about the construction of a tile shower so you can have an understanding of what goes into this process.
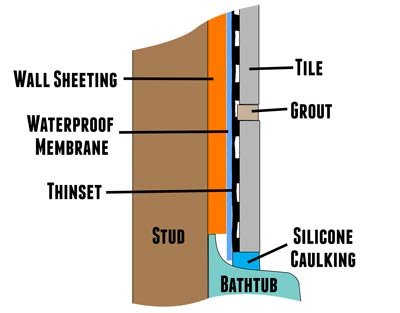
In the diagram above, a cross-section of a tiled shower wall, you’ll see the tile components and how they interface.
First, you have the studs, which are typically spaced 16″ apart and provide the structure for the wall. Then, you have some sort of wall sheeting, which can be drywall, cement board, or a tile-specific board such as Kerdi-Board by Schluter Systems. The wall sheeting will be attached to the studs with screws.
Then, on top of the wall sheeting, you want to have a waterproof membrane. Next is the thinset, a type of concrete designed to attach the tile to the wall. Finally, you have the grout between the tiles and silicon caulking between the tub and the tile. Notice that there is NO vapor barrier. A vapor barrier is not a legitimate way to waterproof and shower.
And that brings up a common question, which is…
What is the best way to waterproof a shower?
As you may already know, there are lots of different methods.
I won’t get into the pros and cons of each method because that would take forever. Instead, I’m just going to tell you which one I think is best for a DIYer or pro: the Kerdi system by Schluter.
With this system, the waterproofing is built into the wallboards that you install. However, some other things must be done to make it completely waterproof. So why do I think this is the best system?
- It’s lightweight and easy to cut.
- There are no fumes or strong odors to deal with.
- It’s high quality and will last a lifetime if installed properly. Schluter even offers a lifetime warranty that covers labor and materials.
- They have many online videos and resources to answer your questions and help you do the job right.
Of course, there is one downside—it’s expensive. The Schluter system will cost between $500 and $600 for a typical 3 x 5” shower. For some people, that’s too much and want a cheaper option.
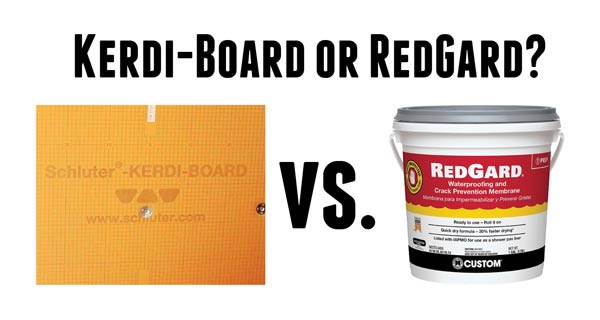
Now, there are other cheaper options. If you want to save money, using RedGard to seal your shower is another good option for DIYers.
RedGard is a waterproof barrier that you paint over cement board.
This will save you significant money, but there are two downsides here. The first one is that you have to work with cement board which can be heavy, awkward, and dusty to cut. The second downside is that Redgard has a very strong odor, and it has been known to bother some people who are sensitive to chemicals or have asthma.
Again, I recommend the Schluter system because even though it is more expensive, it will save you a lot of time, and time is money. It will also be more enjoyable to work with and will likely lead to a higher-quality installation. So, that is the method I’ll demonstrate in the video above and this article.
However, if you decide to use Redgard or another method, most of the tile installation process I cover will still be the same. Let’s jump into how to install a tile shower step by step.
Installing Tile In A Shower Step By Step
Step #1 – Demo the old shower
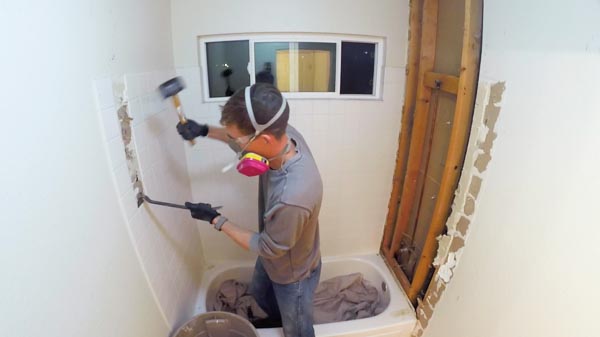
Before you come swinging with a sledgehammer, I recommend locating all of the studs, especially on the sidewalls, which will transition from tile to drywall.
By being mindful here, you can save yourself considerable time because you can eliminate the need for drywall repairs later. You don’t need to turn off the water to the house for this step as long as you avoid damaging the plumbing and leave the shower valve closed.
Do whatever you can to remove the old shower while avoiding damaging anything you want to keep in the new shower installation. A pry bar and rubber mallet are nice tools to have for this. To remove the bathtub, you’ll need to remove the 2×4 stud on the side opposite the drain so you can lift it out at an angle. Go here for full details on how to remove and replace a bathtub. The demo is a quick step and will only take a couple of hours.
Step #2 – Flatten and Plumb The Walls
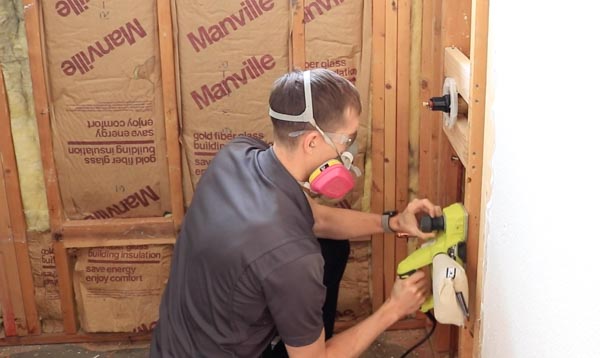
For your tile shower to look good, the walls must be flat and plumb (perfectly vertical). Otherwise, your tiles will be wavy and uneven.
So, the next step is to make sure the walls are flat and plumb and, if not, adjust as needed. To do this, grab a very straight board or flat edge long enough to span each wall. Then, place the flat edge against each wall horizontally to check for high or low spots in the wall. Mark a plus sign wherever a gap exists between the board and the stud so you know where to shim the wall out. If you find a high spot sticking out past the rest of the wall, draw a minus sign indicating that you need to shave that spot down. Then get a straight edge, ideally at least 6’ long, and do the same thing vertically, marking high and low spots. You’ll also want to take a level to the wall to ensure each wall is plumb – or perfectly vertical. If your walls are uneven or out of plumb, you will notice it once you install the tile, especially in the corners where the two walls meet.
This is an important step because you’re setting the foundation for the tile installation. Once you’ve marked the walls, it’s time to flatten them out. Use a planer to remove the high spots that you marked. Then check for flatness again and keep going until you have as close to a perfectly flat wall as you can get. You could use a belt sander here, but a planer will be about ten times as fast. Removing high spots is the easy part. Shimming out low spots is a little more time-consuming.
If you find that a stud is sunk back into the wall, there are several ways to fix it. One way to do it is to sister another 2×4 against the stud sitting back to bring it out a bit. Another way is to simply add shims. The only caveat here is that you must place the shims exactly where the screws will be placed to install the Kerdi-Board – otherwise, when you screw in the Kerdi-Board, it will just bend, and your wall won’t be flat. You can figure out where the screws will go by measuring from the top of the tub and then marking every 12” from there. Take your time and get the walls as flat and plumb as your patience will allow because this will have a major impact on how professional your job looks when completed.
Step #3 – Bathtub and Plumbing Installation
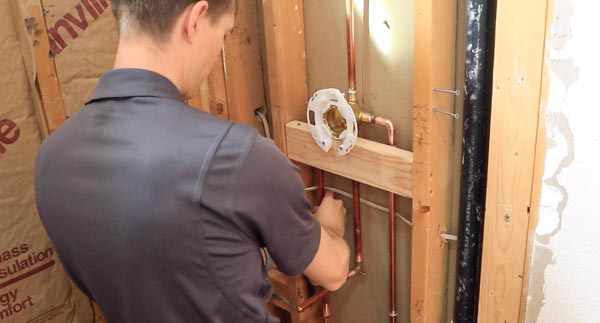
Now, it’s time to move on to the plumbing. Since you have the walls removed, this is the perfect time to replace old, low-quality shower valves or raise the showerhead’s height, so you don’t have to duck down just to get your hair wet.
If you’re confident in your DIY plumbing abilities, then this is a project you can handle. If you’re not, then hiring a plumber is a good idea.
This time-consuming process requires a lot of careful thought to ensure everything lines up, so give it the time and attention it deserves and don’t rush. Once you’ve finished the plumbing for the shower fixtures, it’s time to install the bathtub. The key here is ensuring the bathtub is level and supported well along the entire base. Otherwise, it could crack or move around on you while you’re standing it in. Since this isn’t something you can just fix later, you’ll want to do it right the first time. For more details, watch my complete step-by-step video on how to replace a bathtub.
Step 4: Install The Wall Sheeting (Kerdi-Board)
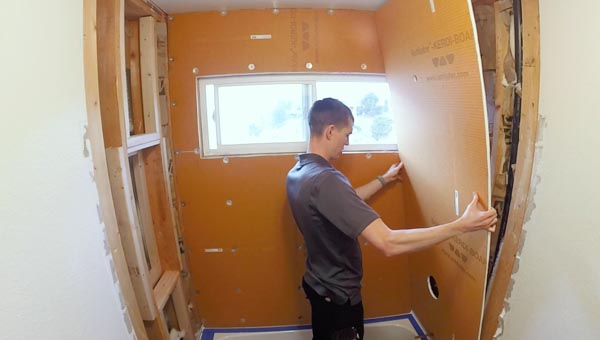
Once the plumbing is all done, it’s time to install the wall sheeting, a product called Kerdi-Board.
This will serve as both a waterproof barrier and a rigid backing for the tile to adhere to. Schluter, the manufacturer of Kerdi-Board, makes Kerdi-Board in a variety of different thicknesses anywhere from 3/16” up to 2” thick. For most tile installations, you will use the 1/2″ thick Kerdi-Board because that will match the drywall’s thickness, which is important because you are often butting it up to the drywall, and you want to avoid any steps in the wall. Some houses have drywall that is 5/8″ thick, so make sure to check the thickness of your drywall before ordering your Kerdi-Board. Installing the Kerdi-Board is actually pretty easy. You basically measure walls, cut the Kerdi-Board to size using a razor knife and a straight edge, and then screw the Kerdi-Board to the walls using the special screws and washers designed to be used with this product. You’ll want to install screws on each stud, with the screws spaced 12” apart vertically. Tighten the screws enough so that the washer begins to compress the Kerdi-Board just to the point where it is no longer sticking above the surface. I recommend starting at the bottom of the largest wall first and working upward. Then move on to the side walls. Install the Kerdi-Board on all surfaces that you plan to tile, including any windows or custom niches, and even on the side of the tub because that tends to see a lot of moisture, and you want it to be waterproof to avoid rot and mold. When installing Kerdi-Board around the bathtub, you want it to sit on top of the tub flange and not overlap it. If you try to overlap it, the wall will bow out at the bottom and look terrible. You’ll come back and seal this up later. When installing the Kerdi-Board on the shower valve wall, you first want to cut the board to fit. Then, go back and measure the location of the fixtures by measuring both from the top of the tub to the center of the fixture and the wall to the center of the fixture. Take your time here and measure carefully because this Kerdi-Board isn’t cheap. Don’t worry about making the holes perfect. We will go back and seal them up later. Now here are just a couple of tips before I move on.
- If tiling around a window or custom niche, you want to ensure that all of the surfaces around the window are perfectly level and plumb and that the cutout is perfectly square. The chances are that your windows aren’t perfect as is, so to fix this, use some thin-set (which is the same stuff you’ll use to install the tile) and use it as a leveling compound behind the Kerdi-Board.
- The ledge of the window or custom niche should be angled slightly so that when water gets on that surface, it naturally flows down into the shower instead of puddling up. This is the only exception to making everything plumb and level.
- Schluter makes pre-made custom niche cutouts. I highly recommend using those if you can because they will save you a lot of time during installation.
Step 5: Waterproofing The Shower with Kerdi-Band
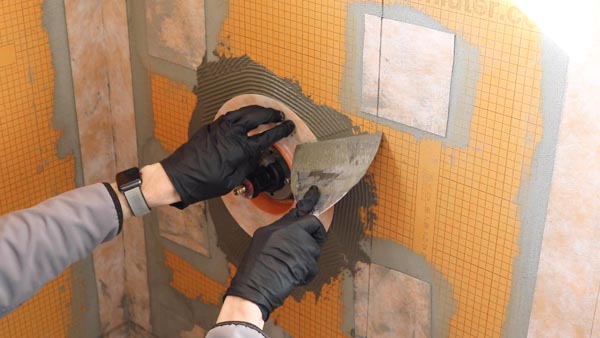
Now that the Kerdi-Board has been installed, it’s time to make the shower waterproof so you can eliminate any chance of water getting behind the walls and causing rot, mold, and all that other nasty stuff that nobody wants. To do this, you’re going to use several other Schluter products that are designed to work with this system. You’ll use Kerdi-Band to seal the corners, the screws, and the joints where Kerdi-Boards meet other surfaces. You’ll use some Kerdi-Fix, a high-quality sealant, and various seals to seal around the plumbing fixtures to create a perfect, high-quality, waterproof barrier that will give you peace of mind for years to come. We’ll start with the hardest part first – which is sealing around the tub where it meets the Kerdi-Board. Start by mixing some thinset to a thin consistency. Then, cut a piece of Kerdi-Band to size to span from the corner to beyond the end of the tub. Next, apply a liberal amount of Kerdi-Fix to the tub flange. Then, apply some thinset to the Kerdi-Board using a 1/8” v-notch trowel as recommended by Schluter. Place the Kerdi-band over the seam, and then use a putty knife to flatten the Kerdi-Band and remove excess thinset and sealant. Your goal here is to create a flat waterproof surface for the tile to be installed all the way around the tub. Next, install the Kerdi-Band in the corners and where the Kerdi-Board meets the drywall. You may need to patch some drywall and let it dry before doing this. Then install the Kerdi-Band on all of the corners and edges of windows and custom niches. And finally, install the Kerdi-Band over all of the screws you used to secure the Kerdi-Board. Basically, anywhere there is a gap, seam, or hole, you’ll cover it with Kerdi-Band. You don’t need to worry about where the walls meet the ceiling unless you install a steam shower. If you are installing a steam shower, then you’ll need to waterproof the ceiling as well. To apply the Kerdi-Band, you’ll need a 1/8” v-notch trowel to apply the thinset, which you can buy directly from Schluter. And you’ll want to use a drywall taping knife to squeeze out excess thinset from behind the Kerdi-Band to keep it as flat as possible. Just don’t overwork it, or the Kerdi-Band will start to come off. Schluter also makes pieces for sealing the corners, which need to be purchased separately. Schluter also makes seals for around the shower fixtures. You’ll need three different seals for your shower. One for the tub spout, one for the valve, and one for the shower spout, which will be a different size than the tub spout. To apply these, use the same process you used for the Kerdi-Band. Apply thinset with the 1/8” v-notch trowel and then go back over it and remove excess thinset while pressing the seal against the Kerdi-Board. Then, if you have a window, you’ll want to apply some Kerdi-Fix to where the Kerdi-Board meets the window on both the sides of the window and the window sill. As you are working, make sure to remove any high spots if there are any. You want the surface to be as flat as possible and ready for tile. Wiping the entire surface down with a damp sponge is a great way to remove any bumps or chunks of thinset.
Step 6 – Planning The Tile Layout
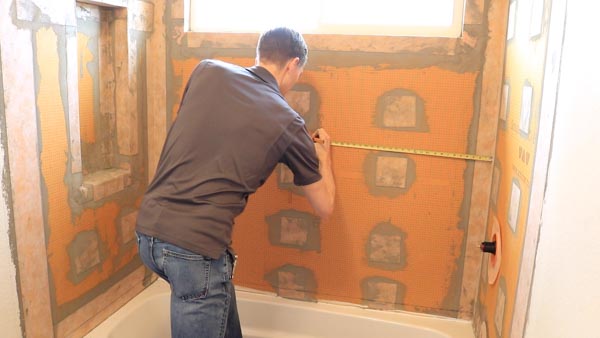
Before you lay a single tile, it’s important to do some planning so your installation looks like a pro did it and not a complete amateur. Your goal with this step is to figure out a starting point for your tile so the install looks symmetrical and there are not skinny pieces of tile. The first thing you want to figure out is how high to start the first row of tiles so you can install a ledger board. There are two reasons you don’t want to just start on top of the tub. Number one, the top of the tub is rarely going to be perfectly flat. It’s designed so that water runs into the tub, so it usually bows in in the middle. The second reason is that you need to consider how the tile will line up with other features that are further up the wall. You want to figure out the best place to start the tile so that the tiles line up so that you don’t have to install small slivers of tile on any horizontal endpoint such as the bottom or top of the niche, the bottom, and top of the window, the tub, or the ceiling. To do that takes some measuring and, in some cases, a few calculations. The larger the tiles you are using, the easier this process is because there are fewer grout joints. When you are using small tile like subway tile, then you’ll want to be even more careful here. So, the first thing to do is draw up a diagram that has all of the measurements. Measure from the tub to every feature, and then measure each feature and its distances from the walls and mark those dimensions on your diagram. Then, measure the exact dimensions of your tile. If you’re using a small tile like I am here, then you’ll get a more accurate measurement by measuring ten or so of them and then dividing your measurement by ten. If you are using spacers for your grout joints, you will obviously want to include those as well because they will determine the stack height of your tiles which is ultimately what you are trying to figure out. The tiles I’m using have spacers built into the tile, which is why you don’t see me using spacers here. Now that you have all the measurements you need, do some calculating and planning so that you can place your tiles in a way that will avoid having small slivers of tile anywhere in the installation. Once you have figured out a good height for the ledger board, which will be used to support your first rows of tile, use a level to draw a line all the way around the shower walls where the top of the ledger board will be. Then, draw a vertical line in the center of the back wall, again using a level to make it perfectly vertical. You’ll also want to draw vertical lines where the tile will end on the side walls. These lines are important because they will guide you while installing the tile later. Take your time on this planning stage and think through the entire installation before you start laying the tile. It’s going to take some time and mental effort, but it’s going to have a big impact on the quality of your tile shower in the end.
Step 7 – Install The Ledger Board
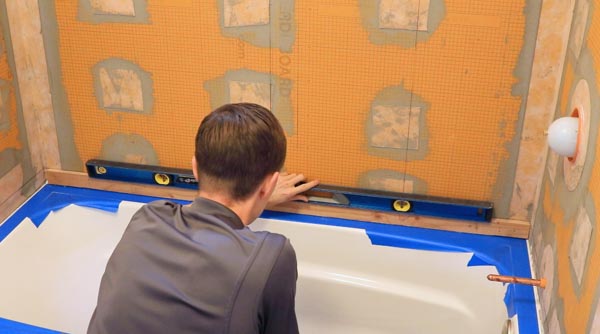
Once you’ve planned your layout and marked the walls, it’s time to install the ledger board – which is just the board that will support the first row of tiles, so the tile doesn’t slide down the wall. Find a straight board and cut it to the size you need to install it around the tub on all walls. Then, secure it to the walls with screws at the locations of the studs. Be careful to avoid the tub flange with the screws. Don’t worry about the holes you just created. We’ll go back and seal those up with Kerdi-Fix later. The key here is to ensure your ledger board is perfectly level all the way around the tub because this will be what supports the tile.
Step 8 – Start Laying the Tile!
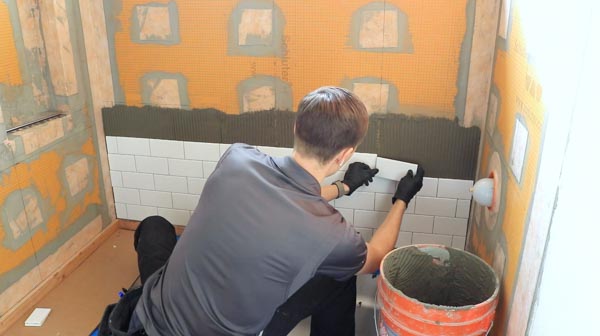
Now you’re finally ready to start laying down some tile! To lay the tile, you’ll need to mix up a batch of thinset, which is pretty straightforward. You just follow the directions on the back of the bag. Once you’ve mixed the thinset, apply it to the walls using a trowel. You’ll want to use the correct sized trowel for the tile you are using. The bigger the tile, the bigger the notch you want on your trowel. For subway tile, you want to use a 1/4” square notch trowel – which means there are 1/4” squares cut out of it. You’ll need a larger trowel if you are using larger tiles. Since you only have a limited time before the thinset begins to harden, you only want to spread it over a small section at a time, so it remains tacky as you cut and install the tile. When spreading the thinset, be sure to leave the guidelines uncovered, so you know where to place the tiles. If you have a laser, then you can use that instead. Once you have thinset spread on the walls, go back and run the trowel vertically so that your trowel lines are parallel to each other and go up the wall. You want these to be as consistent as possible with no bare spots to ensure proper adhesion of the tile. Once you’ve applied thinset to a section, start in the center and place each tile carefully, pressing each tile into the wall and wiggling it back a forth to ensure a consistent bond with the wall. Work your way out toward the corners where you want to leave a small gap of about 1/8” between the tile and the corner.
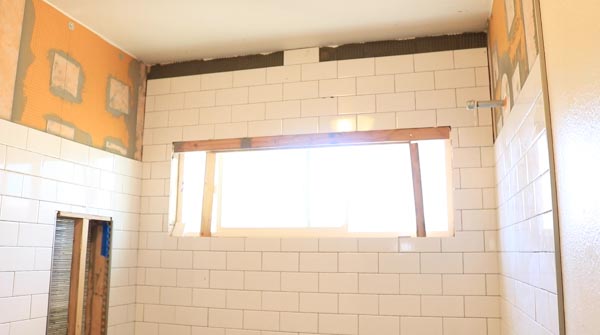
To cut the tiles, you can use several tools. A manual tile cutter is a great tool to have in the bathroom with you to make quick straight cuts. A wet table saw is great to make very clean, consistent cuts or cut many tiles to the same size. Here is a video that demonstrates five ways to cut tile. Continue placing the tiles until you complete the section. This is a messy process, so you’ll want to have a bucket and sponge handy to clean up the thinset as you go. Whatever you do, do NOT let the thinset dry on the surface of the tile or in the grout joints because it can ruin your install. Once you’ve completed a section, go back and make adjustments while the thinset is still wet to ensure the row of tiles at the top is still level. Small wedge spacers are great to make adjustments here, but you may use something different based on the tile you are using. Some tiles (like many subway tiles) have spacers built-in. Most tiles do not, and you will need to use tile spacers to create grout joints. Talk to your local tile shop to get the right tile spacers for your specific project. Before moving up further on the back wall, install the tile on the side walls as well. This is important because it will allow you to make small adjustments as you go to keep the grout joints lined up on all three walls.
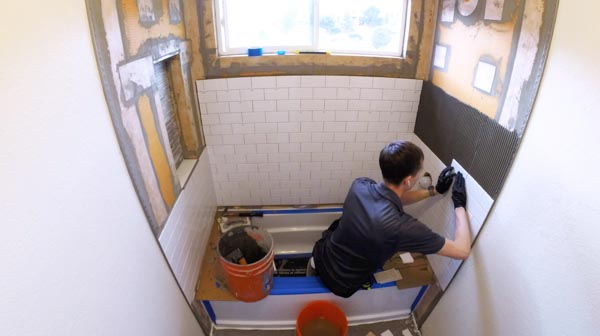
Continue working your way up the walls, section by section. As you run into different features in your installation, you’ll need to make more intricate cuts. A hole saw with a diamond blade can be used to cut holes, and an angle grinder with a diamond blade is helpful to make intricate or curved cuts. Be extra careful when working around windows or custom niches. These features can be very time-consuming because they require a lot of detailed cuts. Work your way all the way up the walls until you reach your stopping point. Once the thinset has hardened on the first section of tile, you can remove the ledger board. Use some Kerdi-Fix to seal up the holes that were created when attaching the ledger board. When tiling around the tub, you want to leave a 1/8” to 3/16” gap between the tile and tub. The gap will be filled in with silicone later. And by the way, you also want to leave about a 1/8” gap between the tiles in the corners. Installing the tile will probably take longer than you expect, but if you take your time and don’t rush things, you will end up with a better tile installation than most pros.
Step #9 – Grout The Tiles
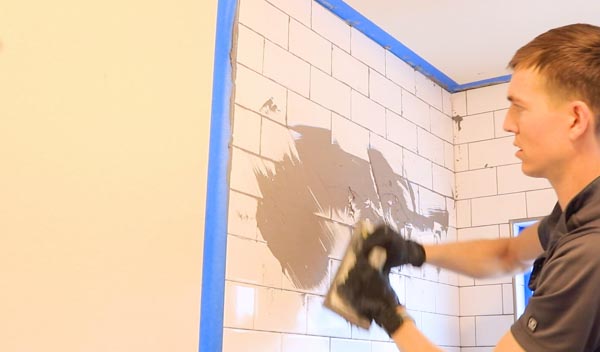
Once you’re done with the tile, wait at least 24 hours for the thinset to cure, and then it’s time to apply the grout. At this point, most of the hard work is over, and you’re almost done. To get started with the grout, mix a small batch of whichever grout you have chosen for your tile project, following the directions that came with the grout. To apply the grout, you’ll need a float, a bucket with clean water, and a brand new sponge. Wipe the grout on the walls with the float and push the grout into the joints to fill them up completely. Then, go back and wipe off the excess grout with the float and come back with a damp sponge to clean up the grout joints. Do this in sections just like you did the tile, so the grout doesn’t harden on you before you have a chance to clean it off with a sponge. Try to avoid getting grout in the corners and between the tile and the tub. These joints will need to be caulked later.
Step #10 – Caulking The Shower
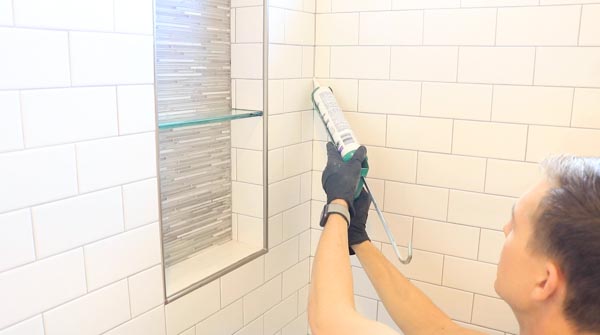
Once you’re finished grouting, it’s time to caulk the shower. You’ll need three different types of caulking. First, one that is the same color as the grout (which will be made by the same company that made the grout you are using). The second one will be a white silicone that matches the tub for caulking around the tub. And the third is a clear silicone for caulking around the shower fixtures. Caulk all of the inside corners of the tile with the colored caulking. You can also caulk between the ceiling and the tile with the colored caulking as well since that doesn’t need to be waterproof up there. Then, caulk around the tub with the white silicone. Take your time with this because it will make a big difference in how good your install looks.
Step #11 – Seal the Grout
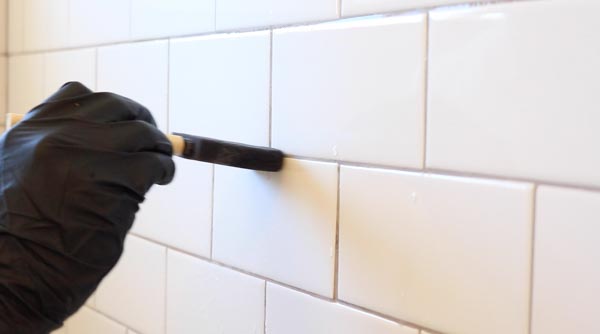
And finally, the very last step is to seal the grout with a penetrating grout sealer. This is an easy step that will help your grout last longer. Pick up a penetrating sealer such as Sealer’s Choice Gold and either spray it on the walls or use a sponge brush to apply it. Then install the plumbing fixtures, and you’re all done!
Some Last Thoughts
As you can see, there are many steps involved with a proper tile shower installation, and this is a more advanced DIY project that will use a variety of skills and probably even require you to learn new skills. However, by taking your time and doing it right, you can save a lot of money on labor, and you can experience a feeling of achievement. If you’re relatively new to tile, expect this process to take a couple of weeks once you have all the materials ready. Maybe you will get it done sooner, but I wouldn’t recommend overwhelming yourself by trying to do this all in a single weekend.
Turn your DIY skills into a profitable side business and make over $100 per hour.

Home repairs and improvements are in high demand, and there aren’t enough service pros to fill that demand.
This is a massive opportunity for any handy person who enjoys helping people.
If this sounds interesting to you, I recommend reading this free report.
You’ll learn ten profitable services you can offer TODAY without a contractor’s license.
Then, I’ll send you more information about what it takes to build a profitable and enjoyable handyman business.
FREE REPORT: 10 Profitable Handyman Services You Can Offer WITHOUT a Contractor License


Very good information, thank you for your effort
Kerdi fix is not rated for waterproofing. Especially for the schluters fleece design. It is simply a bonding product. Dont take my word for it. Research it yourself. Please edit your info as to not give improper advice.
If you visit their website it says it is recommended to be used as a sealant or a joint filling compound. I’m not sure what you mean.