Building a gate for your wood fence can be easy if you follow the correct process. It can be frustrating if you don’t.
Here, I walk you step-by-step through the process of building a gate the right way so it’s easy to build, looks great, and will never sag.
Depending on your skill level, this project will take between four to eight hours and should cost around $140 in materials.
Let’s get to it.
Tools needed for the job
- Circular saw
- Miter saw (optional, but nice to have)
- Tape measure
- Pencil
- Power drill
- 3/16″ drill bit
- Countersink drill bit (optional, but very nice)
- Impact driver (optional)
- Speed square
- Hammer
- Sawhorses
Required Materials
- 2x4s (need two or three)
- Fence pickets (7-10, depending on how wide your gate is)
- 1/58″ screws
- 4″ screws
- Gate hinges
- Gate latch
- Gate handle
Step #1 – Cut the gate rails and position them on a flat surface
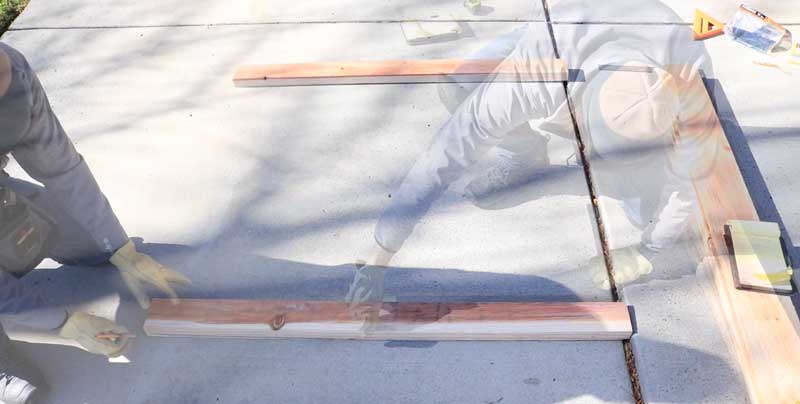
The rails of the gate are the horizontal 2x4s that you will attach the fence pickets to. You will need two rails (a top and bottom rail). Cut both the same size, one inch shorter than the narrowest distance between the fence posts where you will be installing the gate.
Once they are cut to length, position them on a flat surface. You can either use the ground or a bench. You’ll want to position them approximately the same distance from each other as the rails on the fence, but this will be determined by the type of hinge you use. If you are using the hinges I’ve linked to above, position the gate rails, so they are three inches closer together than the rails on the fence.
Then, square them up. If you are working on the ground, mark the location of the fence rails. If you are working on a bench, temporarily screw them to the surface so they don’t move for the rest of the process.
Step #2 – Attach the diagonal support
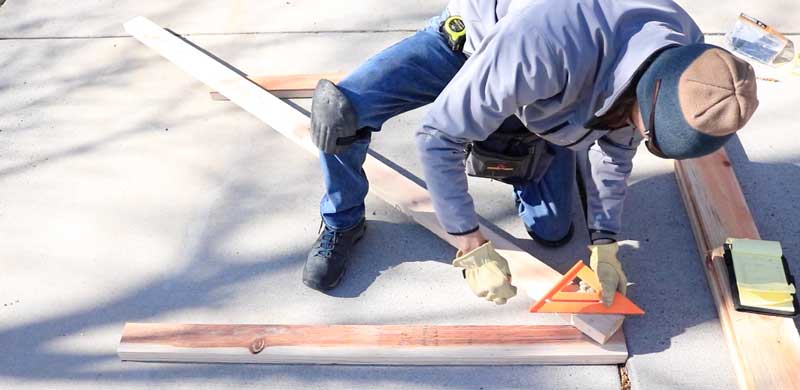
Making sure the rails stay in place, grab another 2×4 and position it over the rails so you can mark where to cut. This will be used as a diagonal brace to prevent the gate from sagging.
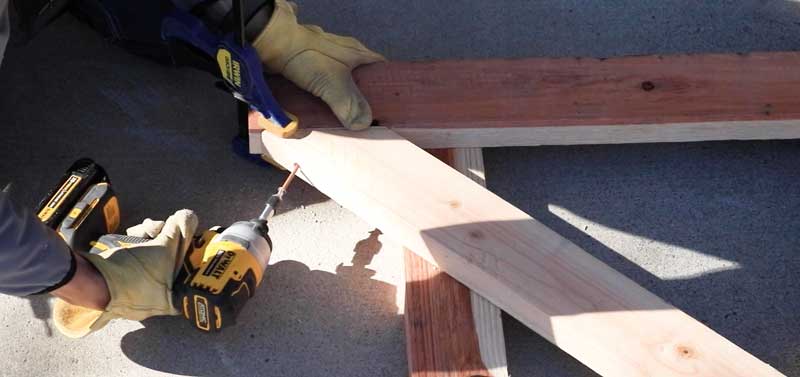
Once the brace is cut, attach it to the rails using four-inch exterior wood screws. You’ll want to predrill the holes in the brace before inserting the screws to avoid splitting the wood. A countersink bit saves time and makes for a better build, but a regular drill bit is fine.
If you’re working on the ground, you’ll notice the rails want to move. Ensure they don’t move too much, or you’ll have a crooked gate. Working on a bench and screwing the rails in place makes this process much easier.
Diagonal Support Orientation
This is important. Install the diagonal brace so that it starts at the bottom on the hinge side. The images in this tutorial are backward. The diagonal support should go from the bottom hinge to be loaded in compression. This will prevent the gate from sagging.
Step #3 – Attach two fence pickets to the hinge side
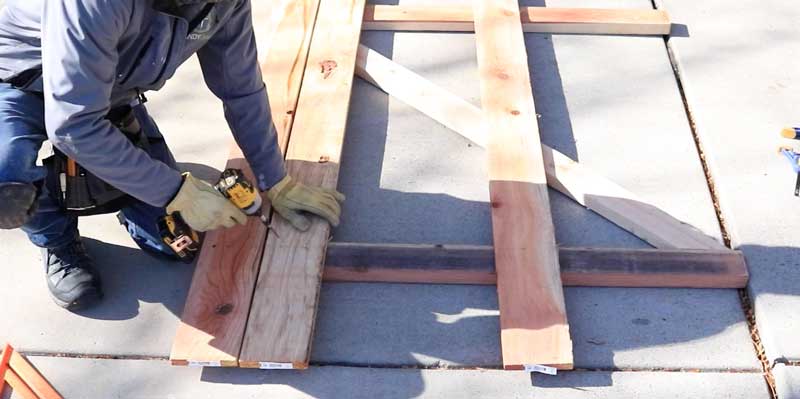
Now that you have a nice “Z” shape, it’s time to attach a couple of fence pickets to the hinge side of the gate. Line the first picket up so the edge is flush with the rails, and place the second one about 1/8″ away from it. To determine where to place the pickets vertically, you’ll need to measure the fence. Measure from the top of the fence pickets to the center of the bottom rail. Take that measurement and mark a line toward the bottom of the gate pickets, then center that on the bottom rail of the gate. This will help align the rails of the gate with the rails of the fence.
Once positioned, attach the gate pickets using 1-5/8″ exterior wood screws. You’ll use six screws per picket—two in the top rail, two in the diagonal brace, and two in the bottom rail.
Step #4 – Attach the gate hinges
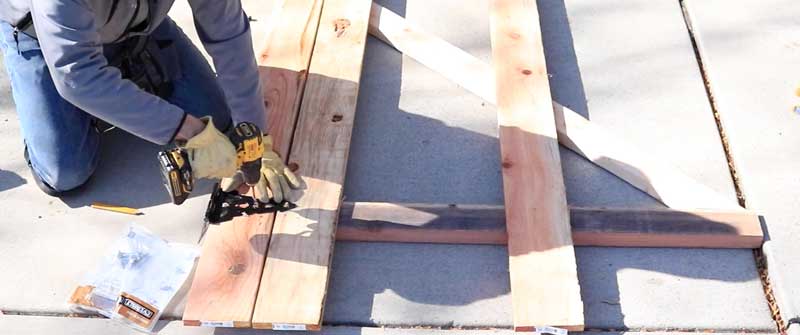
Use a speed square to mark a line across the gate pickets you just installed at the center of the top and bottom rails. This line will be your guide for attaching the gate hinges.
Position the hinges so the center of the pivot point is just hanging off the edge of the fence. Then, mark the hole with a pencil, use a 3/16″ drill be to predrill some holes in the gate, and then use the lag screws to hold the hinges to the gate.
Step #5 – Attach the latch support
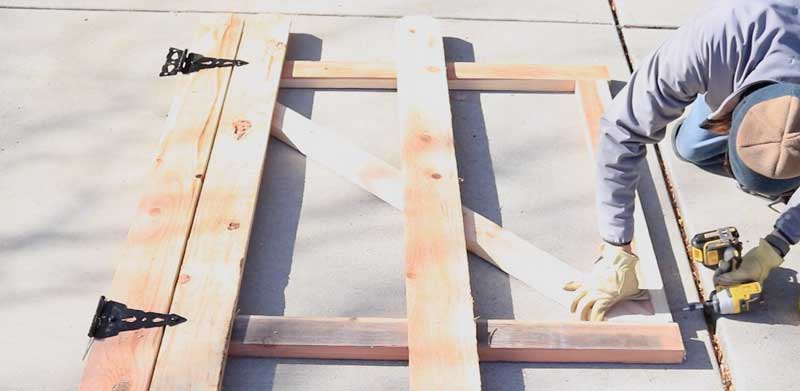
At this point, the gate is a rigid structure and doesn’t need any more support to avoid sagging. However, it does need some support for the gate latch. So, attach one more 2×4 to the latch side of the gate as shown in the image above. Position this so it is about one inch in from the edge of the rails. Attach with four-inch screws.
Now the gate is ready to hang on the fence. We’ll attach the rest of the pickets once the gate is hanging because it’s way easier that way.
Step #6 – Hang the gate on the fence post
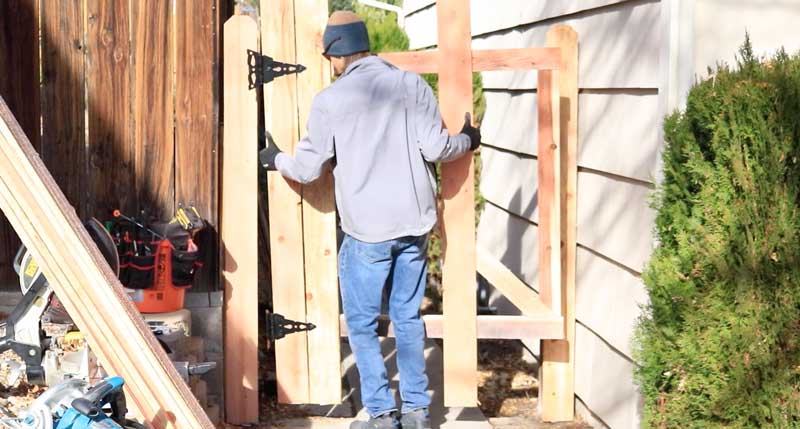
Position the gate so that the top of the gate pickets line up with the top of the fence pickets.
If the gate is sitting up too high, dig a trench below the gate so it can sit lower. If you can’t dig a trench, then cut the bottom of the gate so it can be positioned correctly.
If the gate is sitting too low, use some shims to hold it up.
Butt the hinge side of the gate right up to the post it will be mounted to. There’s no need to leave a gap. Then, attach the gate with the lag screws provided. It’s recommended to only use one screw per hinge for now. We’ll add the other lag screws after the rest of the pickets are installed.
Check to see if the gate fits properly. There should be a gap of about one inch between the rails and the fence post on the latch side of the gate, and the rails of the gate should be approximately lined up with the rails on the fence.
Step #7 – Attach the rest of the fence pickets to the gate
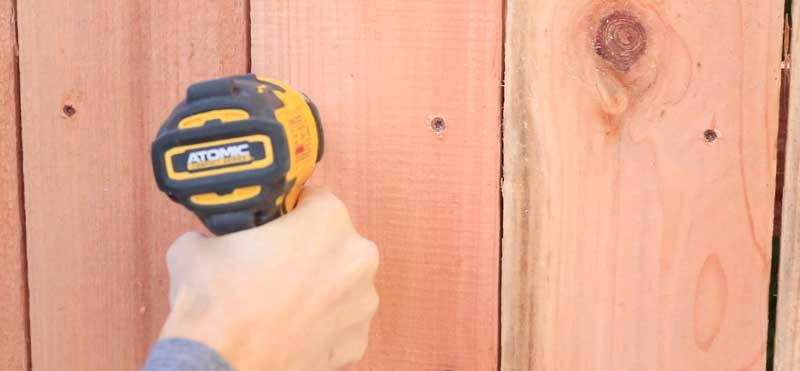
If everything looks good, attach the rest of the fence pickets using the 1-5/8″ exterior wood screws. It’s usually best to just use one screw in the top rail and one in the bottom, for now, to hold the pickets in place. Don’t add the rest of the screws because you may need to move or adjust the pickets later, and you don’t want to have to unscrew a hundred screws.
The last gate board will probably need to be cut to fit. This is normal. Use a circular saw or table saw to cut the board to size so there is about a 1/2 inch gap between the last gate picket and the first fence picket.
Step #8 – Cut the bottom of the gate to fit
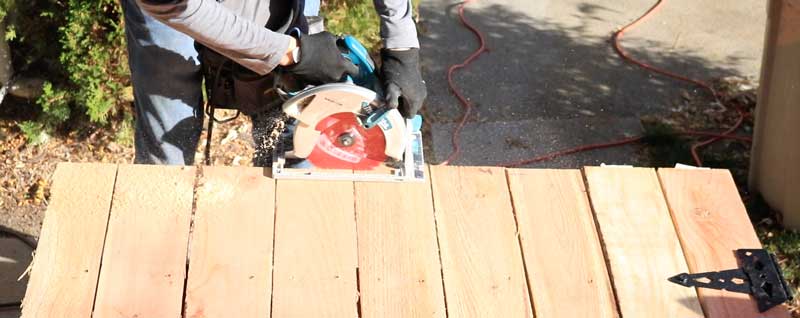
In most cases, you’ll need to cut the bottom of the fence so it has some clearance above the ground and can be operated easily. So, with the gate installed and in the closed position, mark a line about 1″ above the ground level. Then, remove the gate and use a circular saw to cut along the line. This will give you a nice straight line at the bottom of the gate.
Step #9 – Install the gate latch
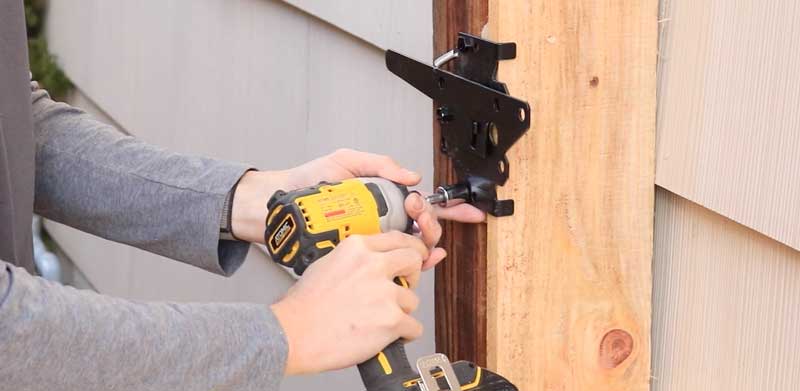
Install the gate latch about 2/3 of the way up the fence. You can mount it lower or higher if you want as well, but 2/3 is typical. The gate latch comes with the lag screws to attach it. Make sure to predrill the holes with a 3/16″ drill bit to avoid splitting the wood while inserting the lag screws.
Start by installing the latching mechanism first, then attach the latch to the gate. If you’re unsure how to do this, I highly recommend watching the video at the top of this page.
Step #10 – Install the gate handle
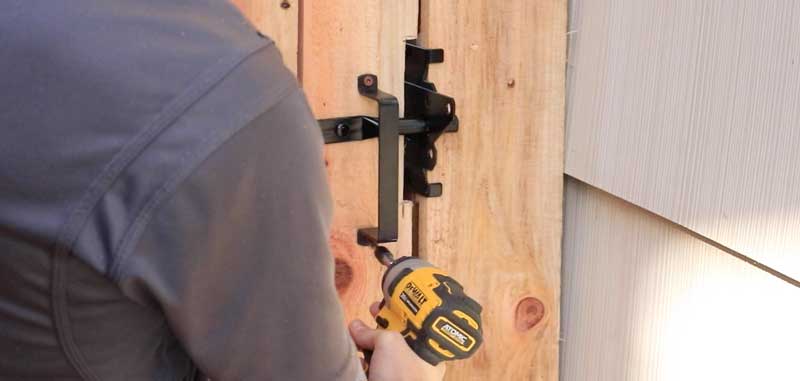
And finally, install a gate handle to make opening your new gate easy. You can put one on the other side as well. Positioning the handle as I show in the picture makes it easy to open the gate with one hand with one simple motion.
And that’s it! Enjoy your new gate!
What is the best kind of wood to use for a wood gate?
My first choice is Redwood. Redwood is a great material for building fences because it stands up against the weather well, materials are readily available, and it doesn’t tend to warp as it dries. It also looks great and doesn’t require any sealer.
Cedar is the next best choice. Cedar is less expensive than Redwood. It’s also easy to source and holds up against the weather. However, it tends to warp as it dries and it doesn’t look quite as good as Redoowd unless you apply a sealer to it.
So, use either Cedar or Redwood in most situations.
What is the best place to buy gate supplies?
Home Depot, Lowes, and other home stores that carry lumber will usually have everything you need to build your gate or fence.
Of course, you can buy some of the materials online, but the lumber will need to be sourced locally.
How long does it take to build a wood fence gate?
If you follow the process I’ve outlined above, it should take you anywhere between four and eight hours, including time at the store. If you are skilled at carpentry, four hours is a good estimate. If this is your first time, expect it to take you the full day.
How much does it cost to build a gate?
If you are building the gate from scratch using the materials I’ve recommended, then you can expect to spend about $125-$160 in material costs.
How can I prevent my gate from sagging?
The key to preventing your gate from sagging is to install a diagonal brace and use exterior wood screws instead of nails to assemble your gate.
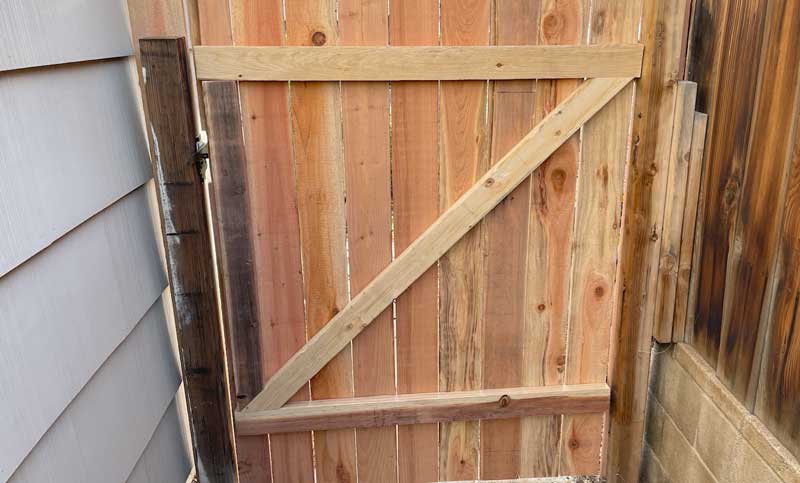
As long as you secure the diagonal brace to the rails using 4-inch screws and then secure the fence pickets to the brace using 1-5/8″ screws, it will create a rigid design that won’t sage. There is no need for special gate brackets (They don’t make the job easier or better in any way, just more expensive).
Additionally, the orientation of the diagonal brace is important. You want the diagonal brace to start at the bottom hinge and go up and out from there. Installing it the opposite way will also work in most cases, but it will be more likely to sag since the joints between the diagonal brace and the rails will be in tension rather than compression. This will make them slowly pull apart over time.
I don’t recommend using nails to build a gate because they loosen over time and will lead to sagging. Use exterior fence or deck screws.
Turn your DIY skills into a profitable side business and make over $100 per hour.

Home repairs and improvements are in high demand, and there aren’t enough service pros to fill that demand.
This is a massive opportunity for any handy person who enjoys helping people.
If this sounds interesting to you, I recommend reading this free report.
You’ll learn ten profitable services you can offer TODAY without a contractor’s license.
Then, I’ll send you more information about what it takes to build a profitable and enjoyable handyman business.
FREE REPORT: 10 Profitable Handyman Services You Can Offer WITHOUT a Contractor License


Hey.
Good article. I am about to build a gate and this was helpful. I do have a question though, why in step 1 do you recommend closing the distance on the rails/hinges with the ones you linked to instead of keeping them aligned with the fence rails?
Thanks
MIke
It’s way easier to attach the hinges to the post reliably.
In your comments you said to (hinge side Z latch side) to help prevent sag however in your build you did the opposite (latching side Z hinge side). Also in your video you mentioned to temporarily attach the hinge using the center hole mount however you used the top hole to temporarily secure your hinge. Good video but a few mistakes and confusing especially when it came to the Z frame.
Any videos on installing the wood posts?
Not yet
I’m curious about the brace, because the pictured gate does not have the brace starting “at the bottom hinge and go up and out from there.” I have read that the diagonal brace is directionally different for wood than metal, so I’d like to be sure before I build a wooden one which way it’s supposed to go.? Thanks
Go from the bottom hinge up. The only time it’s better to go from the top hinge down is if you have a tension cable with a turnbuckle to tighten it. The pictures in this article are a mistake.
I didn’t read the over-verbose text but the gate in pictures is DEFINITELY BUILT UPSIDE DOWN with the wood in tension and will pull the screws when loaded by water weight in rain or a kid riding it. Always put the wood in compression and locked into the corners of the frame. If you have to use tension to support it, use cable and think carefully about how to attach it (through-eye bolts with large washers so wood is in compression and not lag screws trying to pull out of wood in tension).
Agreed, which is exactly how I explain it in the video and the text. Thanks for leaving a comment, though.
How tall is this gate in this post? Are the two rails and cross brace sufficient for a six foot gate? Is it not necessary to have vertical support between the rails? Thanks so much for the informative article!
Six feet tall. Yes. No vertical support is needed.
Very helpful article, thank you. My gate is between two masonary walls. 2×4 are attached to the masonary walls as posts for the gate. My HOA requires the gate to be the same color as the masonary walls. My question is “ what wood is best for the gate and posts in my situation”? None of the wood touches the ground and it needs to be painted. Three handyman types all say pressure treated lumber but I’m not sure. Any guidance is appreciated.
My fence pickets are going to be horizontal, how would I build the frame for that application?
The same way, you’d just need two more vertical support pieces on either side to attach the horizontal pickets. You can also eliminate the bottom rail on the gate since that does nothing more than give you something to attach the pickets to. The structure of the gate is the triangular shape connecting the hinges to the top right corner of the gate.
Thank you for sharing this detailed guide! As a handyman company owner, I appreciate the clear, step-by-step instructions and valuable tips to prevent gate sagging. This will be a great resource for anyone looking to build a sturdy and reliable wood fence gate.
The diagonal support is incorrectly place the top portion needs to be on the outside of the door connected to the inside bottom. The design in step #2 will lead to a sagging fence within the year. Flip that and you’re good to go.
Thanks so much for this! One Q I have is is there a way to make this lockable from the inside? I’m guessing it’s likely clear and obvious to those who have done these things before, but to me the choice of latch needs to take this into account, and I’d love to have that extra step included in the video. I know the fence pickets won’t keep a really dedicated intruder out, but it might deter the more casual opportunist. 🙂